
Adenium, Backyard Gardening, Cactus & Succulent, Family & Kids' Gardening, Flower Seeds, Garden Planning & Design, Herb Seeds, Homesteading & Self-Reliance, Sensory & Wellness Gardening, Style, Sustainable & Regenerative Living, The Horticulturist’s Lab, Urban & Small-Space Gardening, Vegetables
Winter Sowing: Turn Milk Jugs into Mini Greenhouses
Oct
As the growing season winds down, many gardeners dread the logistics of spring seed starting. Managing expensive LED grow lights, heat mats, and cramped indoor shelving can be overwhelming. But what if you could start your seeds in the dead of winter, leave them entirely outside in the snow, and let nature do the heavy lifting?
Enter Winter Sowing.
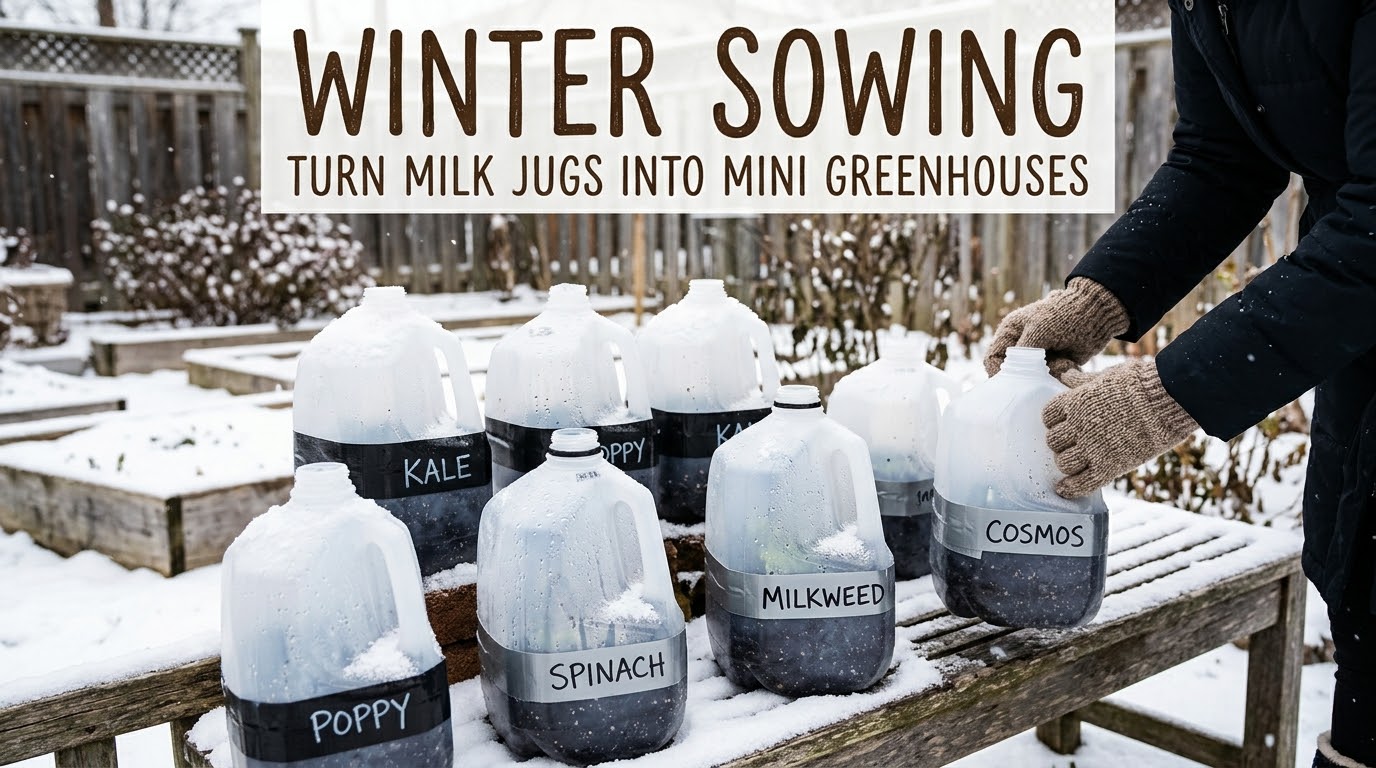
This incredibly popular, low-cost gardening method uses recycled translucent containers (like plastic milk jugs) to create miniature, self-contained greenhouses. Left outside through the freezing months, these jugs perfectly mimic nature’s freeze-and-thaw cycles, yielding some of the toughest, most resilient seedlings you will ever grow.
1. Why Winter Sowing Works
In the wild, a flower drops its seeds in the fall. Those seeds lie dormant under the snow, experiencing months of cold temperatures (a process called cold stratification). When the spring sun warms the soil, the seeds naturally wake up and germinate at the exact right time.
Winter sowing replicates this biological process while protecting the seeds from being eaten by birds or washed away by harsh rains. Because the seedlings germinate outdoors in their natural climate, they never experience “transplant shock” or require the tedious hardening-off process that indoor-started seedlings need.
2. The Best Seeds for Winter Sowing
Not all seeds can survive a deep freeze. Heat-loving crops like tomatoes and peppers will rot if left outside in January. For winter sowing, you must choose cold-hardy varieties:
- Perennial Flowers: Echinacea (Coneflower), Black-Eyed Susans, Lupines, and Milkweed require cold stratification and are perfect for this method.
- Hardy Annuals: Snapdragons, Sweet Peas, Bachelor’s Buttons, and Calendula thrive when winter sown.
- Cold-Tolerant Vegetables: Kale, Spinach, Broccoli, Cabbage, and Brussels Sprouts can be winter-sown to get a massive head start on your spring vegetable garden.
- Cold-Hardy Herbs: Parsley, Chives, and Oregano are excellent candidates for milk jug germination.
3. Step-by-Step Winter Sowing Guide
You can begin preparing and placing your winter sowing jugs outside anytime between December and February.
Step 1: Prep Your “Greenhouses”
Rinse out a clear or translucent plastic milk or water jug (do not use opaque plastic). Discard the cap—you will leave the top open to allow rain and snow to water the seeds naturally. Safely poke 4 to 6 large drainage holes in the bottom. Next, slice around the middle of the jug, leaving the handle intact to act as a hinge.
Step 2: Add Soil and Sow
Fill the bottom half of the jug with 3 to 4 inches of high-quality, pre-moistened potting soil (avoid cheap topsoil, as it compacts). Sow your cold-hardy seeds according to the depth on the seed packet.
Step 3: Tape and Tag
Close the top half of the jug over the bottom and seal the seam tightly with heavy-duty duct tape. Crucial step: Label the bottom of the jug with a waterproof marker or use a plastic plant tag inside. Sun and snow will quickly fade exterior marker ink!
Step 4: Set Outside and Wait
Place your sealed jugs outside in a sunny location where they will receive rain and snow but won’t blow over in heavy winds. Now, walk away! The natural precipitation falling through the open spout will keep the soil perfectly moist.
Step 5: Spring Unveiling
As days lengthen in early spring, look inside the spout. You will see a lush carpet of green seedlings emerging. Once the threat of heavy, deep frost has passed, cut the tape, open the jugs, and transplant your rugged new seedlings directly into your garden beds.
Start Your Winter Sowing Journey
Don’t let a lack of indoor space stop you from growing the garden of your dreams. Start collecting your containers now, and stock up on the cold-hardy genetics you need for a lush spring display.
👉 Shop our Cold-Hardy Vegetable and Perennial Flower Seeds at Urban Garden Seed today!
