
Adenium, Backyard Gardening, Cactus & Succulent, Family & Kids' Gardening, Flower Seeds, Garden Planning & Design, Herb Seeds, Homesteading & Self-Reliance, Sensory & Wellness Gardening, Style, Sustainable & Regenerative Living, The Horticulturist’s Lab, Urban & Small-Space Gardening, Vegetables
Don’t Toss the Guts! How to Save Pumpkin and Squash Seeds for Planting
Oct
Late October is the undisputed season of pumpkins and winter squash. Whether you are carving jack-o’-lanterns for Halloween or roasting a rich butternut squash for a cool-weather dinner, you will inevitably find yourself scooping out piles of stringy, seed-filled pulp.
While many people roast these seeds for a quick snack or toss them straight into the compost bin, that sticky pulp actually contains the foundation of next year’s autumn harvest. Saving seeds from pumpkins and winter squash is one of the easiest seed-saving projects for home gardeners, provided you follow a few essential rules regarding genetics and proper drying techniques.
1. The Cross-Pollination Warning: Will it Grow True?
Before you spend time saving any seeds, you must know what kind of squash you are dealing with. Plants in the Cucurbit family (which includes pumpkins, zucchini, gourds, and winter squash) are notorious for cross-pollinating with one another.
- The Hybrid Problem: If you bought a pumpkin from a standard grocery store, it is likely a hybrid. Seeds saved from a hybrid will not grow “true to type.” Next year, you might end up with a strange, pale, watery gourd instead of a vibrant orange pumpkin.
- The Cross-Pollination Factor: If you grew heirloom pumpkins in your garden this year, but planted them right next to your acorn squash, the bees likely mixed their pollen. The resulting seeds will grow a “mystery squash” next year.
- The Solution: For guaranteed results, only save seeds from open-pollinated, heirloom varieties that were grown at a safe distance from other squash types. If you want to experiment with a mystery grocery store pumpkin, you can—just prepare for a surprise harvest!
2. Step-by-Step: Cleaning the Seeds
Squash seeds are coated in a slippery, sticky membrane that must be completely removed before storage. If you leave the pulp on the seed, it will quickly mold and rot in storage.
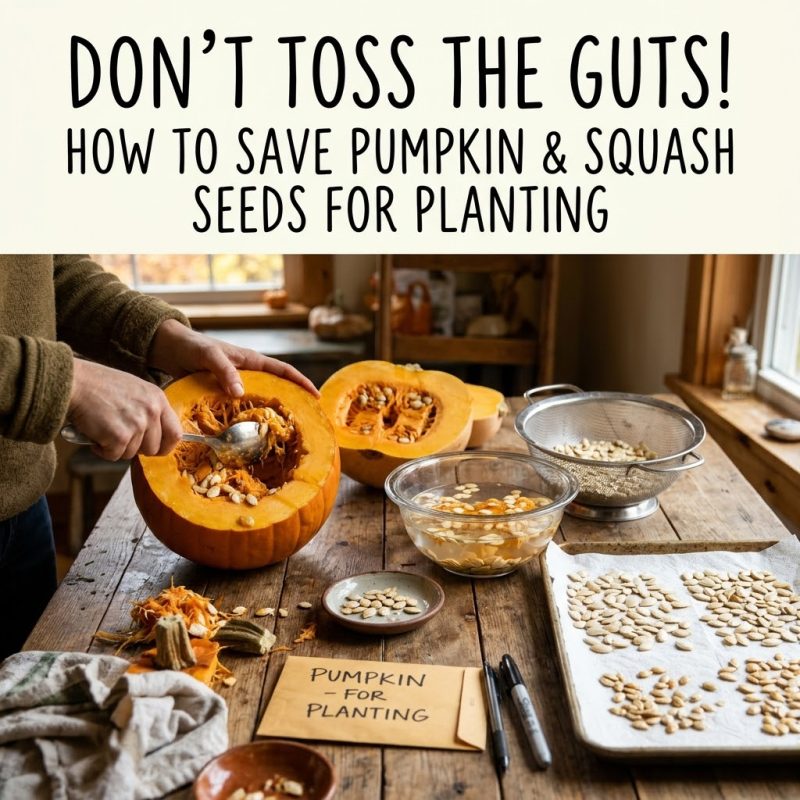
- Step 1: The Scoop. Use a heavy metal spoon to scrape the seeds and pulp out of the pumpkin cavity and into a large mixing bowl.
- Step 2: The Water Bath. Fill the bowl with warm (not hot) water. Use your hands to aggressively rub the pulp and seeds together. The heavy, viable seeds will sink to the bottom of the bowl, while the stringy orange pulp and any “hollow” (dead) seeds will float to the surface.
- Step 3: Skim and Strain. Skim the floating pulp and dead seeds off the top and compost them. Pour the remaining water and the sunken, good seeds into a fine mesh colander. Give them a final, rigorous rinse under cold running water to strip away the last bits of slime.
3. The Drying Process: Patience is Key
Moisture is the enemy of stored seeds. Pumpkin and squash seeds have a thick outer hull that holds onto water, meaning they take significantly longer to dry than smaller vegetable seeds.
Crucial Warning: Never use an oven, microwave, or food dehydrator to dry seeds meant for planting. Even the lowest heat settings will cook the living plant embryo inside, killing the seed instantly.
Spread your clean, wet seeds in a single layer on a piece of parchment paper, a window screen, or a ceramic plate. Do not use paper towels. As squash seeds dry, they secrete a natural glue-like substance that will permanently bond them to paper towels, making them impossible to remove without tearing the seed coat.
Place the seeds in a dry, well-ventilated room away from direct sunlight. Stir them around with your fingers once a day to ensure all sides are exposed to the air.
4. The “Snap Test” for Storage
How do you know when your seeds are dry enough to store? You must perform the “Snap Test.”
After about two to three weeks of air drying, pick up one of the largest seeds and try to bend it in half.
- If the seed feels leathery, soft, or simply bends without breaking, it still contains internal moisture and needs more time.
- If the seed coat is brittle and snaps sharply in half with an audible crack, your batch is perfectly dry.
Store your fully dried seeds in a paper envelope labeled with the variety and the year. Keep the envelope in a cool, dark, and dry place—like a glass Mason jar in the back of a closet or the refrigerator—until spring arrives.
Start Your Heirloom Squash Collection
If you want to guarantee a massive, true-to-type pumpkin patch or winter squash harvest next year, start with stable genetics. Autumn is the perfect time to plan out next year’s sprawling curcubit patch.
👉 Shop our Premium Non-GMO, Heirloom Pumpkin and Winter Squash Seeds at Urban Garden Seed today!