
Adenium, Cactus & Succulent, Family & Kids' Gardening, Flower Seeds, Herb Seeds, Sensory & Wellness Gardening, Sustainable & Regenerative Living, The Horticulturist’s Lab, Vegetables
How to Grow Microgreens at Home: The 10-Day Urban Garden Hack
Jun
If you live in an apartment and think you don’t have enough space or sunlight to grow your own food, think again. The ultimate gardening hack doesn’t require a backyard, a balcony, or even a deep pot. It just requires a shallow tray and a sunny window.
Welcome to the world of microgreens.
Microgreens are essentially vegetable and herb seedlings harvested right after their first true leaves develop. They are packed with concentrated nutrients, cost a fortune at the grocery store, and can be grown on your kitchen counter in just 7 to 10 days.
If you are ready for the fastest, most foolproof way to start your urban gardening journey, here is everything you need to know to grow microgreens from seed.
1. The Best Microgreen Seeds for Beginners
Not all seeds work well for micro-gardening. You want varieties that germinate rapidly and offer a crisp, flavorful bite. Here are the four absolute easiest microgreen seeds to start with:
| Microgreen Variety | Flavor Profile | Days to Harvest | Best For |
| Radish | Spicy, peppery | 7–10 Days | Salads & avocado toast |
| Broccoli | Mild, earthy | 8–12 Days | Smoothies & sandwiches |
| Sunflower | Nutty, crunchy | 10–14 Days | Snacking & wraps |
| Pea Shoots | Sweet, fresh pea | 10–14 Days | Stir-fries & garnishes |
Pro Tip: Never use standard garden seeds treated with fungicides for microgreens. Because you are growing them densely and eating them immediately, you must use high-quality, untreated, non-GMO seeds specifically packaged for sprouting or microgreens.
2. The 3-Step Countertop Growing Guide
Growing microgreens is closer to a fun kitchen science experiment than traditional gardening. You don’t need fertilizer, and you barely need soil.
Step 1: Prep Your Tray
Grab a shallow tray (even a clean takeout container with holes poked in the bottom works!). Fill it with just one inch of moistened potting mix or coconut coir. Tamp the soil down so it is perfectly flat. Scatter your seeds densely across the surface—they should be touching, but not piled on top of each other. Give them a heavy misting of water.
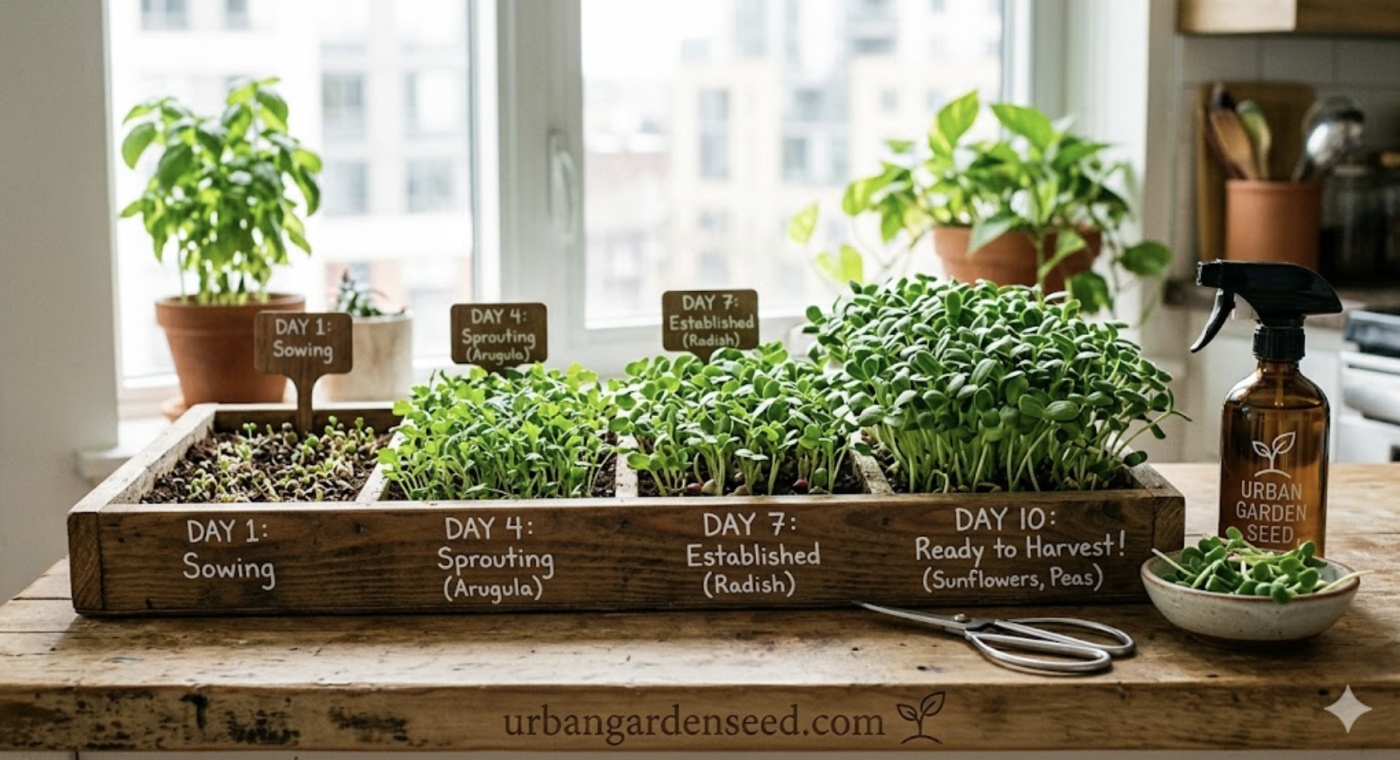
Step 2: The “Blackout” Period
Seeds need to think they are buried underground to germinate. Instead of burying them in dirt, simply cover your tray with another tray (or a piece of cardboard) to block out the light. Leave them covered in the dark for 3 to 4 days, misting them daily. You will see pale, yellowish stems push up—this is exactly what you want!
Step 3: Let There Be Light
Once the stems are about an inch tall, remove the blackout cover and move the tray to a bright, sunny windowsill or under a basic LED light. Within 24 hours, those pale leaves will turn a vibrant, healthy green. Keep the soil moist, and in a few days, take a pair of scissors and harvest your fresh greens right above the soil line.
3. The Economics of Microgreens (Why You Should Grow Your Own)
A tiny, plastic clamshell of wilted microgreens at a premium grocery store easily costs $5 to $8. For that same price, you can buy enough premium seeds to grow ten times that amount, freshly harvested the minute you want to eat them.
Growing microgreens from seed is the highest-yielding, most cost-effective form of urban gardening in existence.
Stop Buying Wilted Greens—Grow Your Own in 10 Days
Ready to turn your kitchen counter into a high-yield mini-farm? Success with microgreens relies entirely on the quality and germination rate of your seeds.
At Urban Garden Seed, our Microgreen Seed Collection features 100% untreated, non-GMO seeds tested for rapid, uniform germination. We provide the exact varieties you need to go from seed to salad in less than two weeks.
👉 Shop our Microgreen Seed Kits and start your 10-day countertop garden today!
