
Adenium, Backyard Gardening, Cactus & Succulent, Family & Kids' Gardening, Flower Seeds, Garden Planning & Design, Herb Seeds, Homesteading & Self-Reliance, Sensory & Wellness Gardening, Sustainable & Regenerative Living, The Horticulturist’s Lab, Urban & Small-Space Gardening, Vegetables
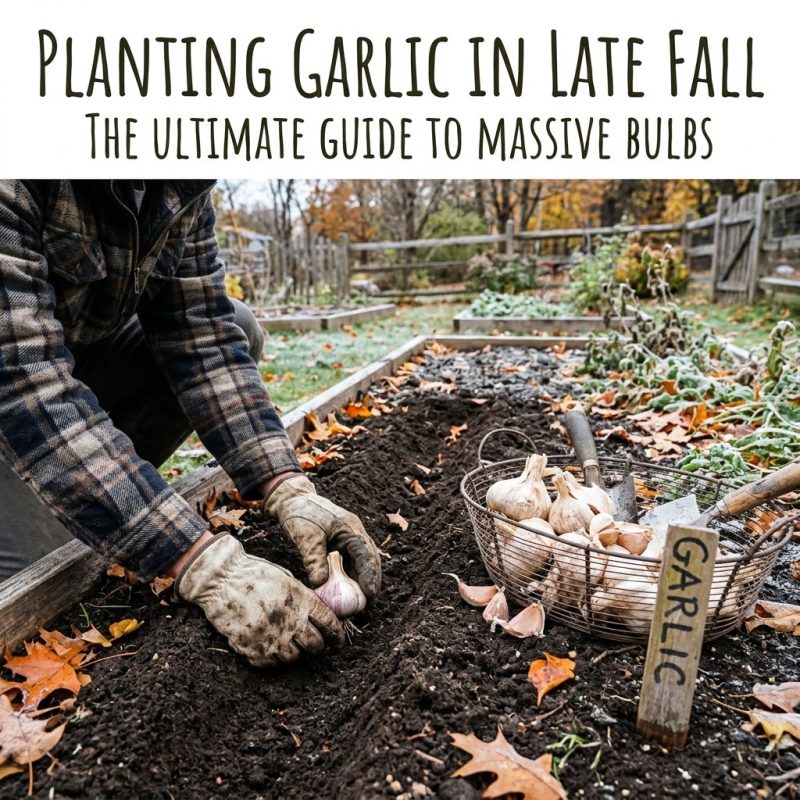
Planting Garlic in Late Fall: The Ultimate Guide to Massive Bulbs
Nov
As November temperatures drop and most garden beds are tucked away for the winter, there is one critical crop that actually demands to be planted right now: garlic.
While many novice gardeners wait until spring, experienced growers know that fall is the undisputed prime time for garlic. Planting garlic before the ground freezes allows the cloves to establish a strong, deep root system and undergo vernalization—a period of winter cold that triggers the bulb to split into individual, plump cloves come summer.
If you want massive, aromatic, gourmet garlic bulbs next year, getting your cloves into the cold autumn soil this month is your most important garden project.
1. Hardneck vs. Softneck: Which Should You Grow?
Before planting, you need to choose the right variety for your climate and culinary preferences. Garlic generally falls into two primary categories:
- Hardneck Garlic: The darling of cold-climate gardeners. Hardneck varieties (like Music, Chesnok Red, and German Extra Hardy) produce a stiff central stem and boast complex, fiery, gourmet flavors. They thrive in northern regions with harsh winters and produce delicious edible garlic scapes in early summer.
- Softneck Garlic: Best for milder southern climates and storage. Softneck varieties (like California Early and Inchelium Red) do not produce a hard central stem, making them easy to braid. They have a milder flavor and store significantly longer in the pantry than hardnecks.
2. Garlic Variety Quick-Reference Guide
| Garlic Variety | Best Climate | Flavor Profile | Storage Life | Edible Scapes Produced? |
|---|---|---|---|---|
| Hardneck (Music) | Cold to Moderate Winters | Robust, spicy, complex | 4–6 Months | Yes |
| Hardneck (Chesnok Red) | Cold Winters | Rich, sweet when roasted | 4–5 Months | Yes |
| Softneck (California Light) | Mild Winters & Coastal | Classic, mellow garlic | 9–12 Months | No |
| Softneck (Inchelium Red) | Wide Range of Climates | Earthy, mild | 8–10 Months | No |
| Elephant Garlic | Moderate Winters | Mild, subtle garlic-leek flavor | 6–8 Months | Yes (Technically a leek) |
3. Step-by-Step Fall Garlic Planting Guide
Step 1: Break Apart the Bulb (Keep the Skin!)
Just a day or two before planting, gently break your garlic bulbs apart into individual cloves. Crucial rule: Leave the papery brown skin intact on every single clove. That skin acts as a protective shield against soil pathogens and fungal rot over the winter. Discard any tiny, bruised, or damaged cloves.
Step 2: Prep a Well-Draining Bed
Garlic hates sitting in stagnant water. Choose a sunny location that receives at least 6 to 8 hours of direct sunlight. Work a generous amount of aged compost into the top 8 inches of soil to ensure loose, nutrient-rich earth. Avoid adding high-nitrogen chemical fertilizers, which cause excessive leaf growth at the expense of bulb development.
Step 3: Planting Depth and Orientation
- Spacing: Plant individual cloves about 6 inches apart in rows spaced 12 inches apart.
- Depth: Push each clove securely into the soil so the pointy end faces straight up, about 2 inches deep below the soil surface (or 3 to 4 inches deep if you live in an extremely cold northern region with freezing winters).
Step 4: Mulch Heavily for Winter
Once your cloves are tucked into the soil, rake the bed smooth and cover it with a thick 4- to 6-inch layer of clean straw, chopped leaves, or hay. This heavy winter blanket prevents the alternating freeze-thaw cycles that can heave shallow cloves right out of the soil.
Step 5: Spring Awakening
Leave the mulch in place all winter. As the snow melts and spring temperatures rise in March, you will see bright green garlic shoots poking straight through the straw. Pull back the mulch slightly around the shoots, water during dry spells, and get ready for a massive harvest next summer!
Secure Your Harvest for Next Summer
Great kitchen gardens are planned months in advance. Don’t let autumn slip away without planting the foundation for next year’s gourmet cooking.
👉 Shop our Premium Heirloom Garlic Bulbs and Fall Planting Essentials at Urban Garden Seed today!